
In this detailed guide we’re going to run through (almost) everything you need to know about the best smartphone photography advice on the web today.
Be the time you’re done with the inside info below you’ll know:
The importance of keeping your camera lens clean
How important lighting is to all of your photos
How to better frame and compose your pictures on your phone
…and that’s just the tip of the iceberg!
Ready to jump in?
Let’s do this!
Keep Your Camera Lens Clean and Clear
Proper Framing Takes Photos to the Next Level
Don’t Sleep on Grid Lines (Especially When Starting Out)
Portrait Mode is Great for Bokeh
Shoot Better Action Shots with Burst Mode
Digital Zoom is Something to Shy Away From (Mostly)
Dramatically Improve Your Editing with Dedicated Apps
Keep Your Camera Lens Clean and Clear
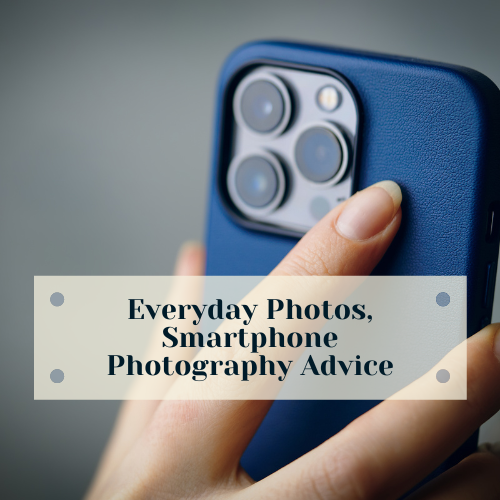
One of the most important things you need to know if you’re serious about snapping better pictures with your phone is to keep the lens clean and clear.
Chances are good that you’ve lined up a great shot with your phone before, clicked the shutter button, and then opened the image up to something fuzzy, cloudy, hazy – nothing like what you saw on your screen when you took the shot.

Our phone lenses are subjected to the kind of use and abuse that most cameras never are. They get stuffed in our pockets (with everything else), jammed up against the fabric of our clothes, and get handled with sometimes-not-so-clean hands all the time.
By keeping your lens clean and clear (and double checking before you start snapping photos) the quality of your smartphone photography will skyrocket.
A quick wipe down with a napkin or paper towel (or even a clean bit of your shirt) is all it takes to improve your pics straightaway.
Lighting is Critical!
Just like with traditional photography, smartphone photos are made – or ruined – depending on lighting conditions.
Regardless of whether you’re snapping pictures indoors or out, you need to be thinking about your light sources and how they impact your shot all the time.
Shoot too close to a light source and you’ll end up with a lot of flare. Shoot too far from a light source, though, and you’ll end up with images that have no real detail.

A great way to even out the light you’re shooting with is to use your offhand to sort of shade the lens. That gives you a little more control of how much light gets into the lens, allowing you to influence the mood and atmosphere of your shots in a big way.
As always, look to shoot outdoors during the Golden Hours in the morning or evening. You’ll love the way your pictures come out if you can pre-plan a shot around then!
Proper Framing Takes Photos to the Next Level
One of the biggest mistakes amateur photogs make – and something a lot of pros slip up with every now and again, even – is messing up (or ignoring) the framing of your shots.
You can do some amazing things editing your work after it’s been captured. But the final product is ALWAYS going to be influenced directly by the “raw material” shot you’ve captured.

An easy tip for framing your shots better is to move the subject of your photo out of the dead center of your camera lens. Put it off to the side, move it into the foreground or background – tinker with framing to change the way the shot makes you feel.
Learn about the rule of thirds (something we talk about a little more in depth in just a moment) and you’ll find the framing correctly comes pretty naturally to you in no time.
Don’t Sleep on Grid Lines (Especially When Starting Out)
The photography “Rule of Thirds” basically breaks everything you see in your viewfinder (or on your phone screen) into nine equal sized blocks. Three rows of three columns.
The three by three grid lets you better frame your shots, getting the subject (or most interesting part of your photo) as close to the corners of these intersecting lines as possible.
Smartphone cameras have the tech to turn a grid line overlay on, making it so you don’t have to do the heavy lifting of envisioning the lines yourself. This puts framing almost on autopilot!
It’s not a bad idea to use these gridlines whenever you’re shooting – no matter what you’re shooting, either. You’ll see the difference in photo composition almost straight off the bat, too.
Portrait Mode is Great for Bokeh
How you focus your photos will make or break the look of each picture that you shoot, and smartphones have gotten better and better at handling focus than ever before.
Touch focusing tools are available on pretty much every modern smartphone under the sun. Even the more affordable options – though “flagship” devices usually have a couple extra features that take focusing to the next level.

One of those “power features” is the ability to introduce a bit of bokeh into your photos just by leveraging the Portrait mode most phones include with their standard camera app.
Bokeh helps to focus the subject you want to be razor sharp while gently blurring the rest of the photo, really pulling your subject off the background and making it much more “in view”. It’s a great way to soften busy backgrounds with a lot going on, backgrounds with elements that would have otherwise distracted from the subject of your shot.
A cool thing about controlling the bokeh effect with your smartphone is the ability to dial up or dial down its impact. This is something you would have only been able to do in the past with heavy duty editing software – but now it’s built right in!
It’s never a bad idea to try different bokeh effects (and different strengths) on the same shot to see which one makes the most sense for you.
Shoot Better Action Shots with Burst Mode
A huge advantage of capturing photos with your phone (and digital devices in general, really) is that you don’t have to worry about burning through expensive film with less than perfect shots.
The storage options on today’s phones run in the hundreds of gigabytes (some even have a terabyte of storage or more) – and that’s just onboard storage!
Most phones allow you to further extend your storage with mSD cards or cloud storage solutions, too.
The bottom line is simple – you can shoot and shoot and shoot (almost forever) and you’ll never have to worry about running out of space.

This means you can shoot in burst mode as well (snapping multiple photos at once), a particularly useful move when you want to capture action shots. Now you don’t have to worry about timing the shot.
All you have to do is point, focus, click the burst, and let the phone do the rest of the heavy lifting for you.
Best of all, you can tinker with your burst settings as well.
Every phone sets you up with a standard burst (usually capturing 5 seconds of photos, with between 10 and 15 pictures captured in that burst), but you can easily extend the burst timeline – and the amount of photos snapped during the burst, without much trouble.
Burst photo settings can be used to capture more natural and spontaneous photos, too. Have your subjects chat and laugh and move around while you shoot them in burst and you can pick the best of the bunch when you’re all done!
Digital Zoom is Something to Shy Away From (Mostly)
While it’s never a bad idea to make the most of your smartphone camera’s hardware capabilities, digital zoom still leaves a lot to be desired.
Pano shots are much better than ever before. Wide angle shots are much better, too. But digital zoom still has a long way to go until it’s close to what you’d get with a “real” camera.
In a pinch the digital zoom will get the job done. But you’re usually much better off snapping a shot with no zoom at all and then zooming in during post processing. You’ll have more control and you wouldn’t have sacrificed image quality along the way.

If you really want to take your phone to the next level, think about getting your hands on an accessory zoom lens for your phone. These are generally pretty inexpensive, very easy to use, and significantly extend the utility of the camera on your phone.
That’s a little overkill for most folks, though. It might be something you grab, keep in your car, and then bust out only when you need to do some more serious snapping with your phone.
Dramatically Improve Your Editing with Dedicated Apps
At the end of the day, the photos that you capture will almost always benefit from a bit of editing and a bit of touching up.
The camera apps that come stock with Apple and Android devices give you a ton of options for basic edits. But if you’re serious about really elevating your photos, the chances are good you’ll need a dedicated photo editing app (or several) to give you much more control.
Free apps are available on both major smartphone platforms and are worth checking out. You’ll be able to transform your pictures with just a few taps and some sliding of different setting bars. These apps aren’t hard to get a handle on, either.
Paid apps can take your photo editing to the next level, though.
Snapseed, Photoshop Express, and other editing apps put legit graphic design tools at your fingertips. You’ll be able to (relatively) easily get your phone shots to a level that would have been tough to execute otherwise.

You can go one step further, though, and use editing apps on your computer.
Full blown software options like Adobe Photoshop and Lightroom make the same tools graphic designers and professional photographers/editors accessible. There’s a little bit of a learning curve (especially for Photoshop), but these tools let you do ANYTHING to your photos.
Master them and you’ll have valuable skills that’ll pay dividends for as long as you shoot with your phone!
Closing Thoughts
Hopefully you’ve found the smartphone photography advice we’ve highlighted above useful.
These amazing little cameras are always in use, always ready to go, and so foolishly simple to use that it’d be almost criminal not to record major moments and life milestones with them.
Armed with the inside info above you’ll be able to upgrade your smartphone snapshots in a major way, all without spending too much time, energy, or effort. The pictures you put on social media – or print out – will be leaps and bounds better than what you were capturing in the past, too.
As always, you’ll get better with your smartphone camera if you practice the tips and tricks we outlined above. Try and use at least one of them a day for a week or so (before moving onto the next) and before you know it you’ll be a smartphone snapping master!
Quick FAQ
Why do some phones have three or more cameras?
Multi-camera arrays on today’s flagship smartphones have significantly increased their capabilities.
Now you can shoot with even more detail (up to 4K resolutions) with ease, capture action shots with advanced burst modes, and shoot in very low light conditions without ill effects.

Multi-camera arrays also make it easier than ever before to capture huge panoramas, 3D photos, and so much more. The tech is getting better and better, too – which means your photos will get better and better each year as well.
How many megapixels should a phone camera have (at minimum)?
While megapixel count isn’t quite as important today as it was in the past (especially when digital cameras were brand new), you want a phone that offers at least – at least – 12MP.
That’s the absolute rock bottom lowest amount of megapixels you can get away with before photos start to look sort of grainy and dull. Any more than 12MP is a bonus, to be sure, but less than that and you’ll be pretty unhappy with the shots you take.
Can phone cameras be better than dedicated DSLRs?
In a lot of ways phone cameras are already better than DSLRs.
They are a whole lot more convenient to use, much more portable, and offer almost “instant on” abilities to shoot photos and videos in stunning HD.
There are some tradeoffs, of course – the photos you take with dedicated DSLR tech will always be better looking than what you pull off with your phone – but the difference isn’t as bad today as it was in the past.